Looking for a fun and enchanting way to decorate your home? Or maybe you want a fun craft activity to enjoy with your kids? Look no further than Papier Mache Mushrooms!
In this step-by-step guide, we’ll take you through the process of creating your own whimsical mushroom décor from scratch. These Papier Mache Mushrooms are perfect for adding a touch of magic to any room or for inspiring creativity in your little ones.
Key Takeaways:
- Create your own enchanting Papier Mache Mushrooms with just a few simple materials
- Perfect for adding a touch of whimsy to your home or for crafting with your kids
- Personalize your mushrooms with paint, markers, and embellishments to make them uniquely yours
- Seal and protect your finished mushrooms with clear sealant to make them more durable
- Add a touch of magic to any room, garden, or special event with your finished Papier Mache Mushrooms
Materials Needed for Papier Mache Mushrooms
To create the perfect Papier Mache Mushrooms, make sure you have the following materials:
|
Newspapers or Scrap Papers |
For making the papier mache paste and layering the mushroom base and cap. |
|---|---|
|
Flour |
For preparing the papier mache paste recipe that will serve as the adhesive for your paper layers. |
|
Water |
To mix with the flour to achieve the desired smooth consistency for the paste. |
|
Balloons |
To form the mushroom shape and create a sturdy base. |
|
Toilet Paper Rolls |
For crafting the mushroom stems. |
|
Cardboard |
To create the mushroom caps and shape them into the desired form. |
|
Paint |
For painting and decorating the mushroom caps and stems. |
|
Paintbrushes |
For applying the paint evenly over the mushrooms and adding small details. |
|
Decorations |
Any additional embellishments, such as glitter, beads, or stickers, to create a unique and personalized look. |
With these materials in hand, you’re ready to get started and craft your very own Papier Mache Mushrooms!
Preparing the Papier Mache Paste

To make your own Papier Mache paste, all you need are equal parts flour and water. Simply mix them together in a large bowl until you achieve a smooth consistency.
Tip: Use warm water to dissolve flour faster and create a smoother paste.
This homemade adhesive is perfect for your Papier Mache Mushroom crafting project. It is non-toxic, easy to make, and budget-friendly. Plus, you can always adjust the recipe to suit your needs: add more water for a thinner paste or more flour for a thicker consistency.
Creating the Mushroom Base
To begin creating your Papier Mache mushroom, you first need to make the mushroom base. Start by inflating a balloon to the size of your desired mushroom. This will serve as the core structure for the base.
Next, cut strips of newspaper or scrap paper and prepare the Papier Mache paste mixture by mixing equal parts flour and water in a large bowl until you achieve a smooth consistency.
Dip the paper strips into the paste mixture and gently squeeze off any excess paste. Layer the paper strips around the balloon, forming the mushroom cap and stem. Repeat this process until you have a sturdy base for your mushroom.
Be sure to smooth out any rough edges and allow the base to dry completely before moving on to the next step. Once it’s dry, you can move on to crafting the stem and cap for your Papier Mache mushroom.
Adding the Stem

After creating the mushroom base, it’s time to add the stem. Cut a toilet paper roll to your desired stem height and attach it to the top of the mushroom using more Papier Mache paste. Be sure to secure the stem firmly and smooth out any rough edges to create a seamless connection between the base and the stem.
Crafting the Mushroom Stem is a crucial step that will determine the stability of your Papier Mache mushroom. Take your time to make sure the stem is properly attached before moving on to the next step.
Shaping the Mushroom Cap
Now that the stem is securely attached to the mushroom base, it’s time to shape the mushroom cap. Cut a cardboard circle slightly larger than the diameter of the mushroom stem.
Attach the cardboard circle to the top of the stem using Papier Mache paste. Then shape it into a curved cap using your hands.
Use additional layers of paper to smooth out the surface, ensuring a seamless connection between the stem and the mushroom cap. You can also use the layers of paper to create realistic grooves and bumps on the surface of the cap, creating the texture commonly found on mushroom caps.
With these simple steps, you have now successfully created a sturdy mushroom base with a realistic looking cap.
Drying and Painting

After crafting your Papier Mache mushrooms, allow them to dry completely to avoid any dampness that could cause damage or mold to your creations. Depending on the thickness of your paper layers, it may take a day or two for your mushrooms to dry completely.
Once the mushrooms have dried, you can let your imagination run wild by painting and decorating them in any colors or patterns that you prefer. Acrylic paints work well on Papier Mache, allowing you to mix colors, make gradients, and create intricate designs that will add a touch of magic to your mushrooms.
Let the paint dry before moving on to adding any special details or personalization. This step is important because painting on wet Papier Mache can cause the colors to bleed and result in a messy finish.
Adding Details and Personalization
Personalizing papier mache mushrooms is a fun and creative way to make your creations truly unique. Whether you’re making them for yourself or with kids, adding small details can make a big difference in the final product.
Here are some ideas to get you started:
- Use paint to create spots, stripes or patterns on the mushroom cap. You can use a small brush to add finer details such as tiny dots or stars.
- Add textures to the mushroom cap by dabbing on paint using a sponge or crumpled paper. This will give your mushrooms a more natural, organic look.
- Use markers to draw on small details such as faces, eyes or mouths.
- Attach small decorations such as ribbons, glitter or small plastic mushrooms to the stem or cap using glue. This will add a whimsical touch to your mushrooms.
Remember, personalizing papier mache mushrooms is all about letting your imagination run wild. You can experiment with different colors, shapes, and textures to create a unique and enchanting mushroom that evokes your personality. Don’t be afraid to try new things and see where your creativity takes you!
Sealing and Protecting
After spending time and effort crafting your Papier Mache Mushrooms, it’s essential to protect them from damage. Applying a layer of clear sealant or Mod Podge can help to seal the paper and make the mushrooms more durable. It also ensures that the paint and any decorations you add remain intact and last longer.
When choosing a sealant, make sure it’s non-toxic and safe to use on paper and other materials. You can find a variety of sealants at your local arts and crafts store or online.
Once you have your sealant, use a paintbrush to apply a thin layer to the surface of your mushroom. Be sure to cover all areas, including the stem and cap. Let the sealant dry completely before handling or displaying your creations.
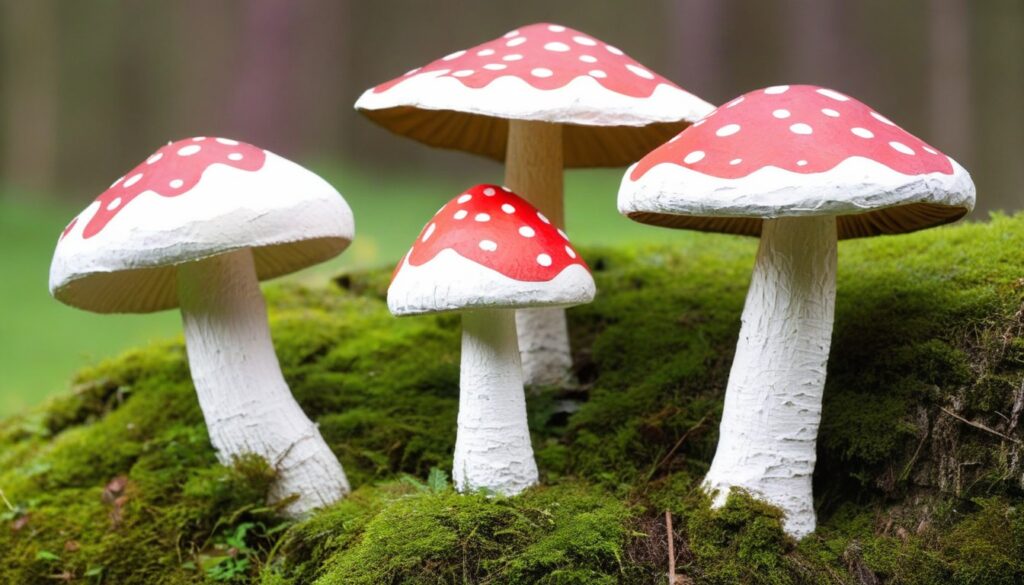
Displaying and Enjoying Your Papier Mache Mushrooms

After all your hard work, it’s time to show off your beautiful Papier Mache Mushrooms. With their whimsical charm, they can add a touch of creativity to any home decor, garden, or special event.
If you have more than one mushroom, why not create a cluster of mushrooms to display together? You can also incorporate them into other crafts, such as fairy gardens or wreaths.
Use different paint colors and patterns to personalize each mushroom, or keep them all cohesive with a unified theme. Get creative and have fun!
Don’t limit yourself and your imagination. Add the crafted mushrooms to your little one’s imaginary playtime, and let them be part of their natural toys collection!
Conclusion
Creating Papier Mache Mushrooms is a fun and easy craft project suitable for all ages. These enchanting mushrooms are perfect for adding a touch of whimsy to your home or garden decor or as props for imaginative play or storytelling. With simple materials like newspapers, flour, and paint, you can create stunning designs that reflect your creativity.
Don’t be afraid to experiment with different colors, shapes, and sizes to make your mushrooms unique. Personalizing your mushrooms with spots, stripes, or tiny mushrooms growing at the base will make them stand out. After completing your mushrooms, you can protect them with a layer of sealant or Mod Podge to make them more durable.
Display your Papier Mache Mushrooms on a windowsill, bookshelf, or any other spot that needs a touch of whimsy. These magical little creations are sure to bring a smile to your face every time you see them. So, what are you waiting for? Gather your supplies and let your creativity bloom with Papier Mache Mushrooms!
FAQ
Can I make Papier Mache Mushrooms with my kids?
Absolutely! Papier Mache Mushrooms are a great craft activity to enjoy with your children. They will love getting their hands messy and creating their own whimsical mushrooms.
What materials do I need to make Papier Mache Mushrooms?
To make Papier Mache Mushrooms, you will need newspapers or scrap papers, flour, water, balloons, toilet paper rolls, cardboard, paint, paintbrushes, and any additional decorations you’d like to use.
How do I prepare the Papier Mache paste?
The Papier Mache paste can be easily prepared by mixing equal parts flour and water in a large bowl until you achieve a smooth consistency. This paste will serve as the adhesive for the paper layers.
How do I create the mushroom base?
To create the mushroom base, inflate a balloon to the desired mushroom size. Then, apply the Papier Mache paste onto torn strips of newspaper or scrap paper and layer them around the balloon, forming the mushroom shape.
How do I add the stem to the mushroom?
Cut a toilet paper roll to your desired stem height and attach it to the top of the mushroom base using more Papier Mache paste. Make sure to secure it firmly and smooth out any rough edges for a seamless connection.
How do I shape the mushroom cap?
Shape the mushroom cap by cutting a cardboard circle slightly larger than the diameter of the mushroom stem. Attach it to the top of the stem using Papier Mache paste and shape it into a curved cap. Use additional layers of paper to smooth out the surface and create a realistic mushroom shape.
How long does it take for the Papier Mache mushrooms to dry?
The drying time for Papier Mache mushrooms may vary depending on the thickness of your paper layers. It usually takes around a day or two for them to dry completely.
How can I decorate and personalize my Papier Mache mushrooms?
Get creative and add details to your mushrooms using paint, markers, or any other embellishments you prefer. You can create spots, stripes, or even tiny mushrooms growing near the base. Let your imagination run wild!
How can I protect my finished Papier Mache mushrooms?
To protect your finished Papier Mache mushrooms, apply a layer of clear sealant or Mod Podge. This will help seal the paper and make the mushrooms more durable. Allow the sealant to dry completely before displaying or using your creations.
Where can I display my Papier Mache mushrooms?
You can display your Papier Mache mushrooms in any room, garden, or special event. They add a touch of whimsy and can also be incorporated into other crafts or used as props for storytelling and imaginative play.
Are Papier Mache mushrooms only for decoration?
While Papier Mache mushrooms make beautiful decorations, they can also be enjoyed as a crafting activity with your kids. Let their imagination bloom as they create their own unique mushrooms!