
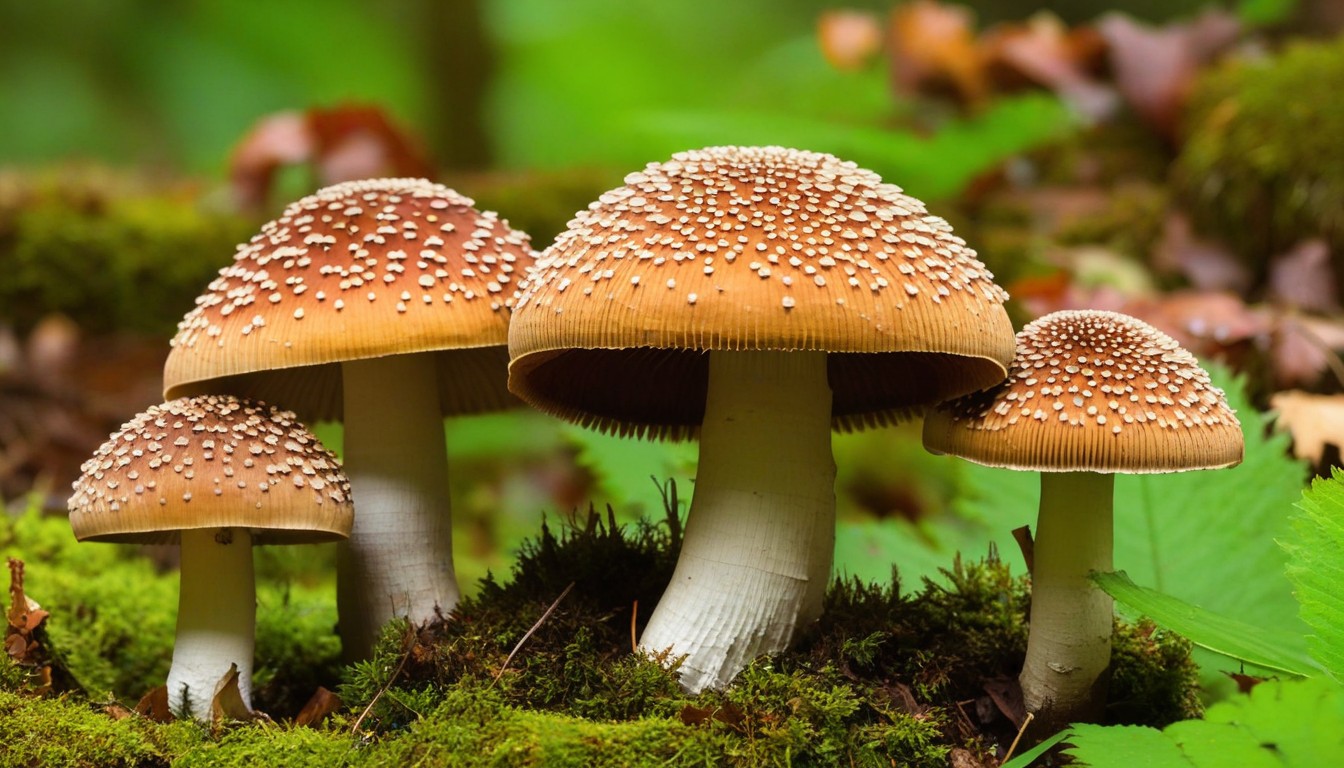
Are you tired of the bland, tasteless mushrooms available at your local grocery store? Do you want to explore the world of fresh and flavorful chestnut mushrooms? Then you’re in luck! Our comprehensive guide will walk you through the step-by-step process of growing delicious chestnut mushrooms right in the comfort of your own home.
With our easy-to-follow instructions, you can create your own sustainable and eco-friendly food source while enjoying the superior flavor and nutritional value of fresh, home-grown mushrooms. Whether you’re a seasoned gardener or a beginner, this guide is perfect for anyone ready to embark on a mushroom-growing journey.
Key Takeaways
- Learn how to create a sustainable and eco-friendly food source.
- Follow the comprehensive step-by-step guide to grow chestnut mushrooms at home.
- Enjoy the superior flavor and nutritional value of fresh, home-grown mushrooms.
- Become a mushroom growing expert and take pride in your garden-to-table food journey.
- Join the growing community of self-reliant and eco-conscious food producers.
Benefits of Growing Chestnut Mushrooms
There are numerous benefits to growing chestnut mushrooms at home. Not only do they provide a sustainable and eco-friendly food source, but they are also packed with nutrients and boast a delicious flavor that surpasses store-bought varieties.
Here are some of the key benefits of growing chestnut mushrooms:
|
Benefits |
Description |
|---|---|
|
Nutritional Value |
Chestnut mushrooms are rich in vitamins, minerals, and antioxidants, making them a healthy addition to your diet. |
|
Freshness |
Homegrown chestnut mushrooms offer unmatched freshness, ensuring that you get the most flavor and nutritional value out of every mushroom. |
|
Sustainability |
Growing your own chestnut mushrooms is a sustainable and eco-friendly way to produce food, as it eliminates the need for plastic packaging and reduces carbon emissions from transportation. |
|
Cost-effective |
Once you have the equipment and materials, growing your own chestnut mushrooms can be more cost-effective than buying them from the store. |
“Growing your own chestnut mushrooms is not only a rewarding experience but also a sustainable and healthy choice for you and the environment.”
Getting Started: Equipment and Materials
Before you start growing your chestnut mushrooms, it’s essential to have the right equipment and materials on hand. Here are the necessary items you’ll need:
|
Equipment |
Materials |
|---|---|
|
Mushroom spawn |
Substrate (usually shredded straw or sawdust) |
|
Growing container (could be a plastic bucket or bag) |
A container for mixing the substrate and spawn |
|
Thermometer and humidity meter |
Hydrogen peroxide for sterilizing the container |
|
Spray bottle for misting |
Coffee grounds or calcium carbonate for adjusting pH levels |
Once you have gathered all the necessary equipment and materials, you’ll be fully prepared to begin your mushroom-growing journey.
Preparing the Growing Container
Before you start growing chestnut mushrooms, it’s important to have a clean and sterilized growing container. This ensures your mushrooms grow in a healthy environment free from unwanted contaminants.
You will need the following items:
- A large plastic container with a lid
- A drill with a 1/4 inch bit
- A cheesecloth
- A pressure cooker
- Rubbing alcohol
- A pair of gloves
Follow these steps to prepare your growing container:
- Clean the container with soap and hot water.
- Drill several holes evenly spaced on the sides of the container for ventilation.
- Place the container and lid into a pressure cooker and steam for 1 hour at 15 psi.
- Put on gloves and use rubbing alcohol to sanitize the inside of the container and lid.
- Cover the container’s ventilation holes with cheesecloth to prevent contamination.
Your growing container is now ready for the next step – inoculating the substrate with mushroom spawn.
Inoculating the Substrate with Mushroom Spawn
Now that your growing container is ready, it’s time to move on to the next crucial step: inoculating the substrate with mushroom spawn. This process involves mixing the spawn with your chosen substrate to create an environment where the mushrooms can grow and flourish.
First, prepare your substrate by following the instructions provided with your mushroom spawn. Typically, you will need to hydrate the substrate and heat it to the appropriate temperature to kill off any potential contaminants.
Next, you’ll need to mix in the mushroom spawn. Depending on the type of spawn you’re using, the process may differ slightly. However, in general, you’ll simply need to spread the spawn evenly throughout the substrate and mix it in thoroughly using a sterilized spoon or spatula.
Once the spawn is mixed in, you’ll want to ensure that the substrate is kept at the optimal temperature and moisture level for your chosen mushroom variety. (Note: insert specific temperature and moisture requirements for chestnut mushrooms here, if relevant).
Pro Tip: Be sure to wear gloves and use sterile tools throughout the inoculation process to prevent contamination, which can lead to poor mushroom growth.
|
Ingredient |
Quantity |
|---|---|
|
Mushroom spawn |
1 pack |
|
Substrate (e.g., sawdust, straw, etc.) |
5 pounds |
|
Gloves |
1 pair |
|
Sterilized spoon or spatula |
1 |
It’s crucial to mix the substrate and spawn thoroughly to ensure even colonization and healthy growth. Once you’ve mixed the two together, you’ll want to transfer the substrate to your growing container as quickly and efficiently as possible to minimize any potential contaminants.
With the substrate and spawn mixed and ready to go, you’re well on your way to growing delicious chestnut mushrooms in the comfort of your own home.
Providing the Right Conditions for Growth
Now that you have inoculated your substrate with mushroom spawn, it’s time to create the right conditions for your chestnut mushrooms to grow. Chestnut mushrooms require specific environmental conditions, including temperature, humidity, and light, to thrive and produce a bountiful harvest. Providing the ideal growing conditions is a crucial step in ensuring your mushrooms grow healthy and strong.
Temperature
The ideal temperature range for growing chestnut mushrooms is between 55°F and 65°F. It’s essential to maintain a stable temperature within this range throughout the entire growing cycle. Fluctuations in temperature can cause stress to the mushrooms and impact their growth and yield.
|
Temperature |
Impact on Growth |
|---|---|
|
Below 50°F |
Growth slows or halts |
|
Above 75°F |
Fruiting bodies shrivel or do not form at all |
Humidity
Chestnut mushrooms require high humidity levels to develop properly. Aim to maintain a relative humidity level between 85% and 95% throughout the growing cycle. Misting the substrate and the walls of the growing container several times a day can help maintain the humidity levels.
|
Humidity Level |
Impact on Growth |
|---|---|
|
Below 70% |
Mushrooms may not form or grow to full size |
|
Above 95% |
Excessive moisture can lead to bacterial or mold growth |
Light
Chestnut mushrooms do not require light to grow, but they do require a little bit of light to initiate the fruiting phase. Indirect sunlight or low-level artificial light can provide enough light for the mushrooms to form fruiting bodies. Avoid exposing the growing container to direct sunlight or bright lights, which can cause overheating and drying out of the substrate.
Ventilation
Proper ventilation is crucial for ensuring the right temperature, humidity, and carbon dioxide levels. Good air exchange can also prevent the growth of unwanted contaminants. Provide fresh air by opening the lid of the growing container or using a fan to circulate the air inside the container.
By providing the right growing conditions, you’ll give your chestnut mushrooms the best chance to grow big and strong. In the next section, we’ll cover how to care for your growing mushrooms.
Caring for Your Growing Chestnut Mushrooms
As your chestnut mushrooms begin to grow, it’s important to provide them with proper care and attention. By following these simple steps, you’ll ensure that your mushrooms remain healthy and vibrant throughout their growth cycle.
Watering
Chestnut mushrooms need to be watered regularly to maintain proper moisture levels. However, overwatering can be detrimental to their growth. It’s important to strike a balance and not let the substrate become too dry or too wet. The best way to water your mushrooms is to mist them with a spray bottle. This will help prevent overwatering and ensure that the mushrooms have enough moisture to grow.
Maintaining Proper Conditions
It’s crucial to maintain proper environmental conditions for your chestnut mushrooms to grow. Keep the growing container in a cool, dark, and well-ventilated area. The ideal temperature for growth is between 60-68°F (15.5-20°C), and the humidity level should be around 85%. You can use a hygrometer to measure the humidity levels and adjust as needed. Additionally, providing proper ventilation will help prevent the buildup of carbon dioxide, which can harm your mushrooms.
Common Issues and Troubleshooting
Even with the best care, you may encounter some common issues while growing chestnut mushrooms. These can include issues such as yellowing or browning of the mushrooms, which can be caused by over or under watering. It’s important to monitor your mushrooms closely and adjust your care accordingly. If you notice any mold growth or unusual smells, it may be a sign of contamination, and you should remove any affected mushrooms immediately.
By following these tips and providing your chestnut mushrooms with the necessary care and attention, you’ll be rewarded with a bountiful and delicious harvest in no time.
Harvesting and Storing Your Chestnut Mushrooms
After weeks of nurturing your chestnut mushrooms, it’s finally time to harvest them. To ensure optimal flavor and longevity, it’s important to harvest your mushrooms at the right time and store them correctly.
Harvesting Your Chestnut Mushrooms
The ideal time to harvest your chestnut mushrooms is when the caps are fully grown but haven’t yet started to curl upwards. This is typically around 2-3 weeks after the pins first appear.
When harvesting, it’s essential to avoid damaging the mycelium, which is the thread-like network that supports the mushrooms. To do this, gently twist and pull the mushroom caps from the substrate, being careful not to pull too hard or use any tools that could damage the mycelium.
Storing Your Chestnut Mushrooms
Once harvested, it’s important to store your chestnut mushrooms properly to preserve their flavor and freshness. Here are some tips:
- Store your mushrooms in a paper bag or wrapped in a paper towel. Avoid using plastic bags, as they can trap moisture and cause the mushrooms to spoil more quickly.
- Keep your mushrooms in the refrigerator, ideally in the crisper drawer. Store them away from fruits and vegetables, as these can release ethylene gas, which can cause your mushrooms to spoil more quickly.
- Use your mushrooms within 3-5 days for optimal flavor and freshness. Alternatively, you can freeze your mushrooms for longer-term storage. To do this, slice the mushrooms and spread them out on a baking sheet. Place the sheet in the freezer until the mushrooms are frozen, then transfer them to a freezer bag and store in the freezer for up to 6 months.
By following these simple tips, you can ensure that your harvested chestnut mushrooms stay fresh and flavorful for as long as possible.
Conclusion
Congratulations, you have completed our easy guide to growing chestnut mushrooms at home! We hope you found our step-by-step instructions clear and helpful.
By now, you should have a good understanding of the benefits of growing your own mushrooms, the equipment and materials needed, and the entire growing process from preparing the container to harvesting and storing your mushrooms.
Taking Action
It’s time to put your learnings to the test and start growing your own chestnut mushrooms! Don’t forget to keep track of your progress and make any necessary adjustments to the growing conditions as needed.
Connecting with the Community
Joining online forums and groups dedicated to mushroom growing can provide you with additional tips and support. You can also share your experiences and learn from others who are passionate about growing mushrooms.
Thank you for reading our guide, and we wish you happy growing!
FAQ
Can I grow chestnut mushrooms without any prior experience?
Absolutely! Our guide is designed for beginners and provides easy-to-follow instructions to help you successfully grow chestnut mushrooms at home.
What is the ideal growing container for chestnut mushrooms?
A plastic or wooden container with good drainage is suitable for growing chestnut mushrooms. Make sure to properly clean and sterilize the container before use.
Where can I find mushroom spawn?
Mushroom spawn can be purchased online or at specialty gardening stores. Look for reputable suppliers that offer quality spawn for optimal results.
How long does it take for chestnut mushrooms to grow?
The growing process typically takes around 4-6 weeks from inoculation to harvest. However, the exact time may vary depending on environmental conditions and the specific mushroom variety.
Can I grow chestnut mushrooms indoors?
Absolutely! Chestnut mushrooms can be grown indoors as long as you provide the right conditions of temperature, humidity, and light. They make a great addition to home gardens or even small-scale indoor setups.
What are common issues that may arise during the growing process?
Common issues include contamination, mold growth, or insufficient moisture. Our guide provides troubleshooting tips and techniques to overcome these challenges and ensure successful mushroom growth.
How should I store harvested chestnut mushrooms?
To maximize freshness and flavor, store harvested chestnut mushrooms in a paper bag or container in the refrigerator. Avoid storing them in airtight plastic bags, as this can lead to moisture buildup and spoilage.