
If you’re a fan of morel mushrooms, you know that their season is all too short. Luckily, there’s a way to enjoy their earthy flavors all year long: canning. In this comprehensive guide, we will show you how to properly can and preserve the delicate taste of morel mushrooms. Discover the step-by-step process to ensure these woodland treasures can be enjoyed year-round.
Key Takeaways:
- Canning morel mushrooms is an excellent way to enjoy their unique flavor all year long
- Properly selecting and preparing morel mushrooms prior to canning is crucial
- There are different canning methods available and choosing the right one is important for successful preservation
- Storing and utilizing canned morel mushrooms can add a flavorful twist to a variety of dishes
- Following necessary safety precautions and troubleshooting tips can make your canning experience even more enjoyable
Introduction to Morel Mushrooms
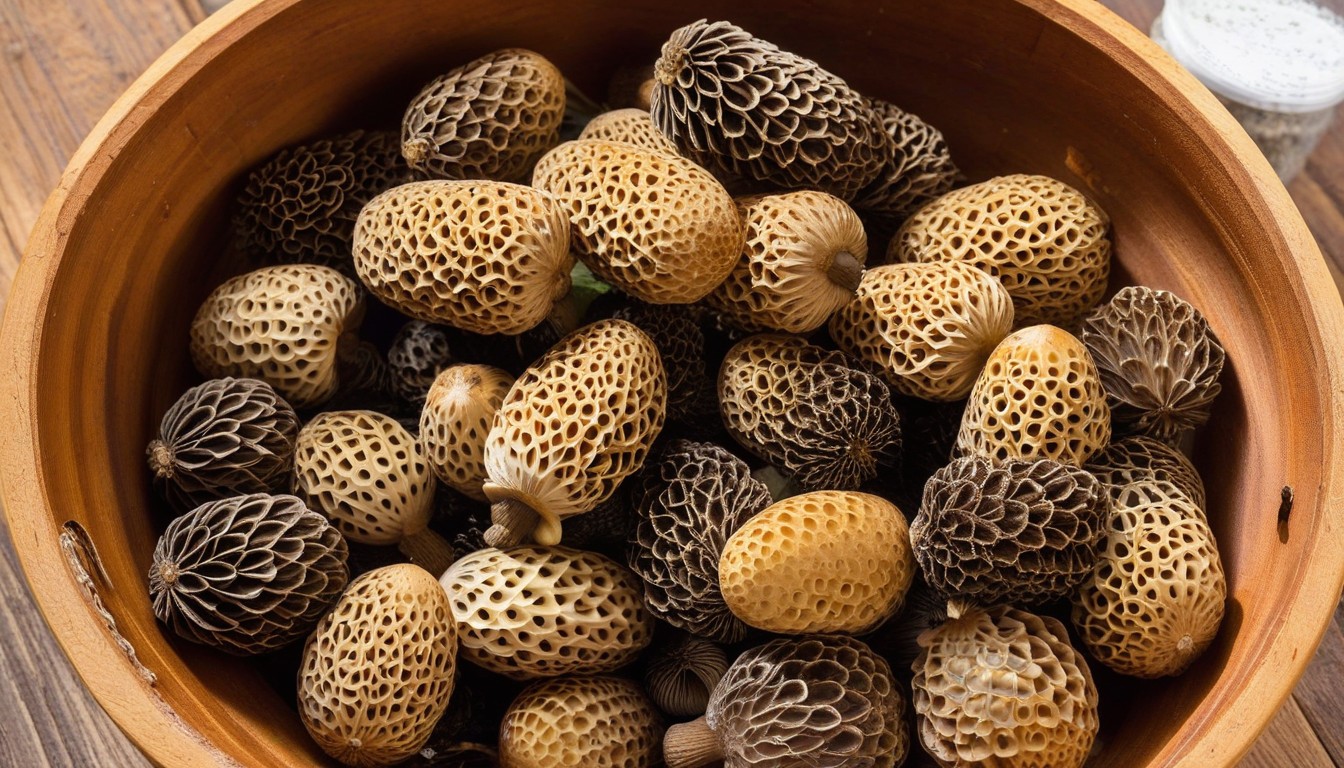
Morel mushrooms are a prized delicacy among chefs and mushroom enthusiasts alike. These unique fungi are known for their distinct shape and rich, earthy flavor that adds depth to any dish. Morels can be found in wooded areas during the spring season and are harvested by hand. While they may be difficult to come by, the taste is well worth the effort.
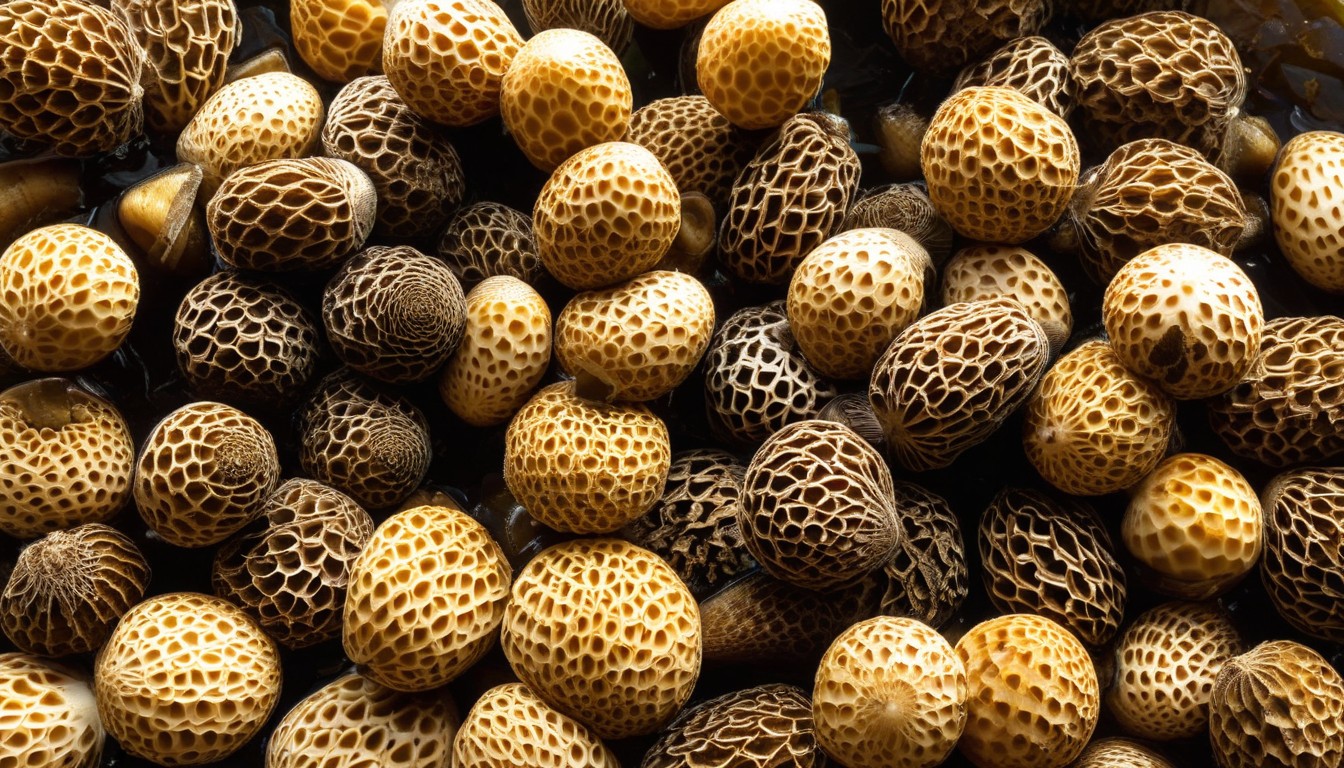
Morels have a distinctive honeycomb texture that makes them stand out from other mushrooms. They are often used in soups, sauces, and entrées to create a full-bodied, umami flavor. Some chefs even incorporate them into desserts for a surprising twist.
While morels may be expensive and difficult to find, they are a true delicacy and a testament to the wonders of nature. Join us as we explore the world of morel mushrooms and learn how to preserve them for year-round enjoyment.
Picking Fresh Morel Mushrooms
Morel mushrooms can be found in a variety of habitats, including forests, meadows, and even your own backyard. To ensure the best quality and flavor, follow these tips when picking fresh morels:
- Choose a sunny day after a rain or during periods of high humidity, which boosts mushroom growth.
- Search for morels around dead or dying trees, especially elm, ash, and cottonwood.
- Look for morels in well-drained soil, such as hillsides and slopes.
- Spot morels by recognizing their distinctive appearance, with a hollow stem, spongy cap, and cone-like shape.
- Harvest morels by carefully cutting the stem at the base, leaving the root and spores in place for future growth.
- Collect morels in a mesh bag or basket to allow spores to spread and prevent spoilage.
Remember to always properly identify mushrooms before consumption and follow safe harvesting practices to preserve mushroom populations and natural habitats. Enjoy the delicious and unique taste of freshly picked morels in your culinary creations.
Preparing Morel Mushrooms for Canning
Before diving into the canning process, it is essential to properly clean and prepare your morel mushrooms. First, give them a gentle rinse under cold running water and use a soft-bristled brush to remove any dirt or debris. Avoid soaking them in water as they can absorb excess liquid, which can affect the texture and flavor.
Next, carefully inspect each mushroom and trim off any tough or woody stems. Some may also have bugs or larvae, which can be removed by cutting off the affected area and discarding it.
If your morels are particularly large, you may want to slice them into smaller bite-sized pieces to ensure even cooking and better distribution in the canning jars. However, if they are smaller in size, they can be left whole.
It is important to note that morel mushrooms should never be consumed raw as they contain a toxin that is only broken down through cooking. Ensure they are fully cooked before canning or consuming.
Required Equipment for Canning Morel Mushrooms
Successfully canning morel mushrooms is all about having the right tools for the job. Here are some essential items you’ll need to preserve these delicious delicacies:
Equipment | Description |
|---|---|
Canning Jars | Glass jars designed specifically for canning, complete with lids and seals. Choose between quart and pint sizes, depending on your needs. |
Pressure Canner | A specialized pot with a tightly sealed lid, designed to heat and pressurize jars to safely preserve low-acid foods like mushrooms. |
Water Bath Canner | A large, deep pot used for the water bath canning method. Must come with a rack to keep jars off the bottom of the pot. |
Canning Funnel | A wide-mouthed funnel designed to fit neatly into canning jars, making it easy to pour ingredients in with little mess. |
Lid Lifter | A magnet-tipped wand designed to easily lift sterilized lids out of hot water and onto jars. |
Jar Lifter | A set of tongs or a specialized grip tool designed to safely lift hot jars out of the water bath or pressure canner. |
Bubble Remover | A simple tool used to remove air bubbles from jars before sealing. |
Kitchen Timer | An essential tool for keeping track of processing times during canning. |
Investing in high-quality equipment will help ensure that your canned morel mushrooms are safe, delicious, and long-lasting.
Selecting the Right Canning Method
When it comes to canning morel mushrooms, there are two main methods to choose from: water bath canning and pressure canning. Each method has its own pros and cons, and understanding them will help you choose the right approach for your needs.
Water Bath Canning
Water bath canning is the simpler and easier of the two methods, making it an excellent option for beginners. It involves submerging jars of prepared food in boiling water for a set amount of time to kill off any bacteria and create a seal that prevents spoilage.
One of the benefits of water bath canning is that it does not require any specialized equipment beyond a large pot and a rack to hold the jars. It is also ideal for acidic foods, like pickles and tomatoes, which can be safely canned with this method.
However, morel mushrooms are low in acid and can be a risk for botulism, a potentially deadly type of food poisoning. Therefore, it is essential to follow a trusted recipe and to acidify the jars to prevent this risk.
Pressure Canning
Pressure canning is the method of choice for low-acid foods like morel mushrooms. This method uses high pressure and temperature to destroy spores and bacteria, ensuring that the food inside is safe for consumption.
The main advantage of pressure canning is that it eliminates the risk of botulism, making it a safer choice for morel mushrooms. It is also more versatile, allowing you to can a wider variety of foods.
However, pressure canning requires specialized equipment, including a pressure canner and specific jars with airtight seals. It also has a steeper learning curve, with more steps involved in the preparation and processing of the jars.
Choosing the Right Method for You
Ultimately, the right canning method for you will depend on your needs and level of experience. If you are new to canning or planning to preserve acidic foods, water bath canning may be the more suitable option. However, if you are experienced with canning and want to preserve morel mushrooms safely, pressure canning is the better choice.
Step-by-Step Guide to Water Bath Canning Morel Mushrooms

To preserve the earthy flavors of morel mushrooms using the water bath canning method, follow these easy steps:
- Sterilize the jars: Wash jars and lids in hot, soapy water, rinse thoroughly, and place the jars in a canner or large pot. Cover with water and bring to a boil. Boil for ten minutes before reducing to a simmer while preparing the mushrooms.
- Prepare the mushrooms: Wash mushrooms thoroughly, removing any dirt or debris, and slice into pieces no larger than 1 inch. Blanch for 3-5 minutes in boiling water, and then, shock in ice-cold water.
- Fill the jars: Remove the jars from the canner using tongs and fill each jar with the prepared mushrooms. Pack tightly but avoid overpacking.
- Add liquid: Pour boiling water or vegetable broth over the mushrooms, leaving ½ inch headspace. Remove any air bubbles and adjust the liquid level as needed.
- Seal the jars: Wipe the rims of the jars clean, center the lids, and screw on the bands. Don’t overtighten!
- Process in water bath: Place jars into the canner or pot of boiling water, making sure the jars are completely covered with at least one inch of water. Process for 90 minutes if using a pint jar, and 100 minutes if using a quart jar.
- Cool and store: Once the processing time is complete, turn off the heat and remove the canner lid. Let the jars sit for 5 minutes before removing the jars from the canner and placing them on a towel to cool. After 24 hours, test the seals, remove bands, wipe, label, and store the jars in a cool, dark place.
By following these simple steps, you can savor the rich flavor of morel mushrooms long after the season has ended.
Step-by-Step Guide to Pressure Canning Morel Mushrooms
Pressure canning is an effective way to ensure your morel mushrooms remain delicious and safe to eat for months to come. Here’s a simple step-by-step guide to pressure canning morel mushrooms:
- Start with clean canning jars and lids. Wash the jars, lids, and rings in hot, soapy water, and rinse them thoroughly before using them.
- Prepare your morel mushrooms by washing them thoroughly and removing any debris or insects. Cut them into evenly sized pieces to ensure they cook evenly.
- Place the morels in the canning jars, leaving about an inch of headspace at the top.
- Next, you’ll need to add the liquid to the jars. You can use water, chicken broth, or other liquids. Be sure to leave the same amount of headspace as you did for the mushrooms.
- Wipe the jar rims with a clean, damp cloth to remove any residue. Then, place the lids and rings on the jars.
- Load the jars onto your pressure canner’s rack and add the appropriate amount of water for your model. Refer to the manufacturer’s instructions for specifics.
- Seal the canner and turn on the heat. Allow the canner to vent for 10 minutes before putting the weight on to pressurize the canner.
- Once the canner is at the proper pressure, start the timer. The processing time will vary depending on your altitude and the size of your jars. Check your canner’s instructions for specifics.
- When the processing time is up, turn off the heat and allow the canner to cool down naturally. Don’t try to speed up the process by opening the canner too soon.
- After the canner has cooled down, remove the jars and check each one for a proper seal. If any jars didn’t seal correctly, you can either reprocess them or store them in the refrigerator and use them within a few days.
That’s all there is to it! With this step-by-step guide, you can confidently use a pressure canner to preserve your morel mushrooms and enjoy them year-round. Remember to always follow proper safety precautions when canning food.
Storing and Using Canned Morel Mushrooms
Preserving the tantalizing flavours of morel mushrooms is only the first step; to fully enjoy their earthly taste, it’s crucial to store and use them correctly. Follow these tips to unlock the full potential of your canned morel harvest.
Storing Canned Morel Mushrooms
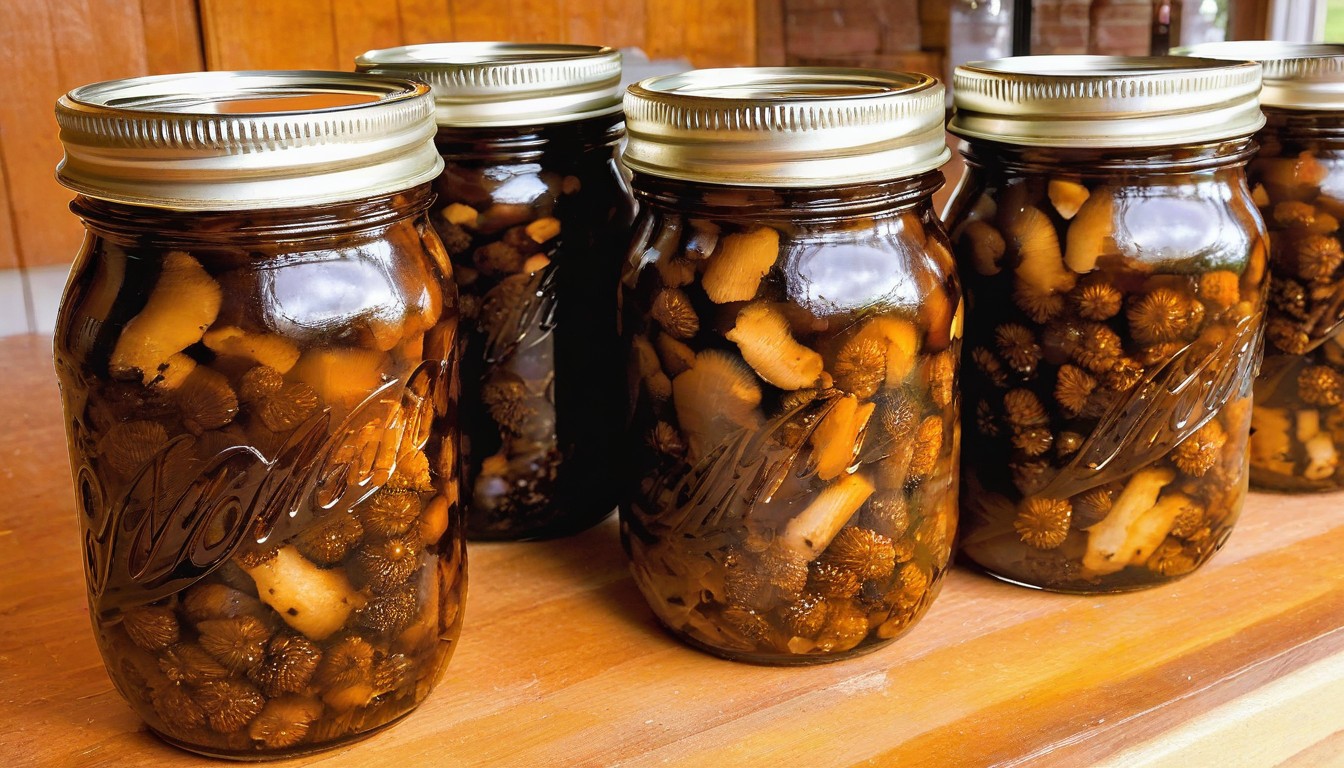
The best place to store your canned morel mushrooms is in a cool and dark pantry or cupboard. Canned foods have a long shelf life and can be stored for up to five years if kept in optimal conditions.
When storing canned foods, always keep them away from sources of heat or humidity, such as direct sunlight or near an oven or stove. It’s important to note that canned foods can lose quality over time, so it’s wise to consume your canned morels within two to three years of canning to ensure the best possible flavour.
Using Canned Morel Mushrooms
Canned morels are incredibly versatile and can be used in a variety of dishes, from simple stir-fries to hearty stews. To use canned mushrooms, simply open the jar, drain the liquid, and rinse the mushrooms in cold water.
For best results, add the canned morels towards the end of your cooking process, as heat can cause them to become tough and chewy. Their intense flavour and meaty texture make them a perfect addition to pasta sauces, omelettes, or even as a topping for pizzas.
Tasty Recipes Featuring Canned Morel Mushrooms
Recipe Name | Description |
|---|---|
Morel Mushroom Risotto | A classic Italian dish that showcases the rich, nutty flavour of morels in creamy rice dish. |
Morel Mushroom Soup | A comforting and flavourful soup that highlights the earthy taste of morels. |
Morel Mushroom and Chicken Stir Fry | A quick and easy stir-fry that pairs tender chicken with the meaty, umami taste of morels. |
Try these tantalizing dishes and discover the versatility of canned morel mushrooms for yourself!
Troubleshooting and Safety Tips
Canning morel mushrooms can be a rewarding experience, but it’s important to take the necessary steps to ensure safety and quality. Here are some troubleshooting and safety tips to guide you through the canning process:
Common Canning Issues
Issue: Jars not sealing properly.
Solution: Check that lids and bands are not damaged before use. Ensure jars are cleaned and sterilized. Process jars for the recommended time to provide a better seal.
Issue: Cloudy liquid in jars.
Solution: This can be a result of overcooking, under processing, or using old ingredients. Ensure proper processing times and use fresh, high-quality ingredients.
Issue: Mold growth in jars.
Solution: This can be a result of incomplete sterilization or not following proper storage guidelines. Discard any moldy jars and ensure proper sterilization and storage techniques are being used.
Safety Tips for Canning
Always follow recommended processing times and methods for the specific type of food being canned. Use proper sterilization techniques and check jars and equipment for damage before use. Avoid using outdated canning recipes or techniques, as they may not meet current safety standards. In case of doubt, refer to the latest USDA guidelines. Rinse all equipment and jars with hot water before using them.
“Canning jars are not suitable for oven, microwave, or conventional baking. Extreme temperatures can cause glass to shatter, posing a significant risk. Use hot water to clean and sterilize jars before use.”
Tips for Safe Canning
- Ensure that pressure canner seals are maintained and pressure gauges are functioning properly.
- Use only recommended jars and lids for canning purposes.
- Store canned foods in a cool, dry, and dark place to preserve flavor and quality.
- Label all jars with contents and date of canning for easy identification.
By following these troubleshooting and safety tips, you can ensure a successful and safe canning experience for your morel mushrooms. Happy canning!
Exploring Morel Recipes
Now that you’ve mastered the art of canning morel mushrooms, it’s time to bring them to life in a variety of delicious recipes. From hearty soups to flavorful stir-fries, canned morels can add depth and complexity to any dish. Check out some of our favorite morel mushroom recipes below:
Morel Mushroom and Asparagus Risotto
Ingredients | Instructions |
|---|---|
|
|
Note: If using dried morels, follow package instructions to rehydrate before use.
Morel Mushroom and Potato Gratin
Ingredients | Instructions |
|---|---|
|
|
Whether you’re cooking up a special dinner or just looking for a comforting weeknight meal, incorporating canned morel mushrooms into your recipes is sure to impress. Experiment with different flavor profiles and cooking techniques to unlock the full potential of these woodland treasures.
Conclusion
Preserving the delicious flavors of morel mushrooms through canning is a rewarding experience for mushroom enthusiasts and foodies alike. Not only does it allow you to enjoy the unique earthy taste of morels all year long, but it also ensures you have a fresh supply of these woodland treasures on hand for culinary creations.
In this guide, we have covered everything from picking fresh morels to selecting the right canning method and troubleshooting common issues. We hope that you have found this information helpful in your canning journey!
It is important to remember to always prioritize safety when canning morels. By following the step-by-step instructions and safety tips provided, you can ensure that your canned morels are of the highest quality and safe for consumption.
So, go ahead and experiment with incorporating canned morels into your favorite recipes. From sauces to casseroles, the possibilities are endless!
Preserve your delights and enjoy the delicious tastes of morel mushrooms all year long.
FAQ
How long do canned morel mushrooms last?
When stored properly in a cool and dark place, canned morel mushrooms can last up to 1 year.
Can I use any type of mushroom for canning?
While other mushroom varieties can be canned, morel mushrooms are particularly prized for their unique flavor and texture.
Do I need to cook the morel mushrooms before canning them?
It is recommended to lightly cook morel mushrooms before canning to improve their taste and texture.
What is the difference between water bath canning and pressure canning?
Water bath canning is suitable for high-acid foods, while pressure canning is necessary for low-acid foods, including morel mushrooms.
Can I reuse the canning jars?
Yes, canning jars can be reused as long as they are in good condition and properly sterilized before each use.
Can I freeze canned morel mushrooms?
Canned morel mushrooms are best stored in a pantry or cellar as freezing can affect their texture.
Are there any safety precautions I should take while canning morel mushrooms?
It is important to follow proper canning techniques, including sterilizing jars, using clean utensils, and processing the jars for the required amount of time to ensure safety and prevent foodborne illnesses.