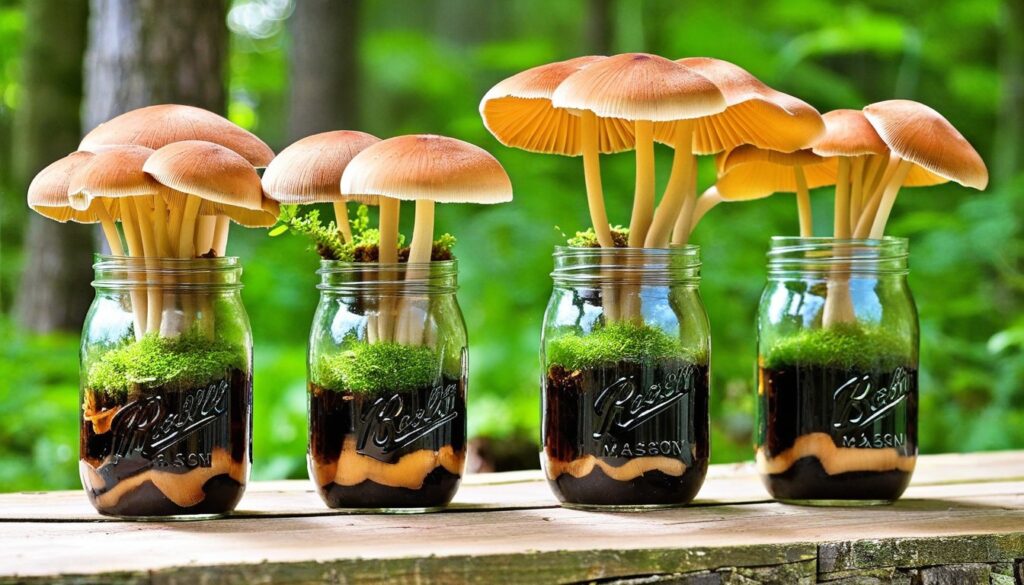
If you’re looking for a fun and easy project to try your hand at home cultivation, consider growing mushrooms in Mason jars. Not only can it be a rewarding experience, but it’s also a cost-effective way to enjoy fresh mushrooms without breaking the bank. Whether you’re a seasoned gardener or a beginner, this comprehensive guide will provide you with everything you need to know to cultivate your own mushrooms in Mason jars right at home.
Key Takeaways:
- Growing mushrooms in Mason jars is a fun and easy project for home cultivation.
- It’s a cost-effective way to enjoy fresh mushrooms without breaking the bank.
- This guide will provide you with everything you need to know to get started.
- Whether you’re a seasoned gardener or a beginner, anyone can grow mushrooms in Mason jars.
- With a little patience and proper care, you’ll soon be enjoying your own fresh and delicious mushrooms.
Benefits of Growing Mushrooms in Mason Jars
If you’re looking for a new and exciting way to grow mushrooms, then using Mason jars may be just the ticket. This unique method of mushroom cultivation offers many benefits that make it a popular choice among growers of all experience levels. Let’s take a closer look at why you should consider using Mason jars for your mushroom growing.
Mushroom Cultivation Benefits
Mushroom cultivation has gained popularity in recent years due to the numerous health benefits that mushrooms offer. From their immune-boosting properties to their rich nutritional content, growing mushrooms at home is a great way to incorporate these healthy fungi into your diet. However, traditional mushroom growing methods can be costly and time-consuming, making it difficult for many people to enjoy the benefits of fresh mushrooms.
This is where Mason jars come in. Using Mason jars for mushroom cultivation is a cost-effective and space-saving option that allows you to grow fresh mushrooms right in your own home. With just a few supplies and some basic knowledge, you can create a thriving mushroom garden in your own kitchen or backyard.
Mason Jar Growing Advantages
|
Advantage |
Description |
|---|---|
|
Small space requirements |
Mason jars require very little space, making them an ideal choice for those with limited growing areas. |
|
Cost-effective |
Mason jars are an affordable option for mushroom cultivation, with most supplies available at your local hardware or grocery store. |
|
Easy to monitor and maintain |
Mason jars provide a clear view of the growing environment, making it easy to monitor your mushrooms’ progress and make necessary adjustments. |
|
Reusable |
Mason jars can be used multiple times, making them a sustainable and eco-friendly option for mushroom growing. |
As you can see, there are many advantages to using Mason jars for mushroom cultivation. Whether you’re an experienced grower or just starting out, this method is a great way to enjoy the benefits of fresh mushrooms while saving money and space.
Choosing the Right Mushroom Varieties for Mason Jar Cultivation
If you’re new to growing mushrooms in Mason jars, it’s important to choose the right variety to ensure a successful harvest. Not all mushrooms are suitable for growing in Mason jars, so it’s essential to select a variety that can thrive in this environment. Here are a few suitable mushroom varieties for Mason jar cultivation:
|
Mushroom Variety |
Description |
|---|---|
|
Oyster mushrooms are a popular choice for Mason jar cultivation due to their quick growth rate and versatility. | |
|
Shiitake mushrooms require a bit more patience and attention, but they are a flavorful and nutritious option for Mason jar growing. | |
|
Lion’s Mane Mushrooms |
Lion’s mane mushrooms are another popular variety for Mason jars. They have a unique texture and flavor and are a great option for vegetarians and vegans. |
While these are just a few examples, there are many other mushroom varieties that can be grown in Mason jars with the right techniques and care. It’s important to do your research and choose a variety that suits your needs and preferences.
Gathering the Necessary Supplies

Before you can start growing delicious mushrooms in Mason jars, you need to gather all the required supplies. Here’s a detailed list of the materials you’ll need for your mushroom cultivation project:
|
Materials |
Quantity |
|---|---|
|
Mason jars |
4-6 |
|
Aluminum foil |
1 roll |
|
Pressure cooker |
1 |
|
Brown rice flour |
1 pound |
|
Vermiculite |
1 pound |
|
Spore syringe or mushroom culture |
1 |
|
Surgical gloves |
1 pair |
|
Sanitizing spray |
1 bottle |
It’s important to note that you should only use wide-mouth Mason jars to make the process easier. Additionally, the vermiculite and brown rice flour should be of high quality to ensure optimal mushroom growth.
You can find most of the mushroom growing supplies at your local gardening store, but you can also purchase them online for your convenience.
Preparing the Mason Jars for Mushroom Cultivation
Before you start growing mushrooms in Mason jars, it’s crucial to prepare the jars properly to ensure optimal mushroom growth. In this section, we’ll guide you through the process of cleaning and sterilizing the jars.
Here are the steps you need to follow:
- Pre-wash: Before sterilizing, it’s important to pre-wash your Mason jars with hot, soapy water. Use a scrub brush to remove any debris or dirt from the jars.
- Sterilization: Proper sterilization is essential for successful mushroom growth. There are different methods for sterilization, but one of the most effective is pressure cooking. Fill a pressure cooker with water and place your Mason jars inside. Heat the water to 15 PSI and leave the jars in for 90 minutes. This will kill any bacteria or other organisms that may interfere with mushroom growth.
- Cooling: After sterilization, allow the jars to cool to room temperature before inoculating them with spores or mycelium.
Remember, cleanliness is crucial to successful mushroom cultivation, so make sure to take the time to properly clean and sterilize your Mason jars.
Creating the Mushroom Substrate
When growing mushrooms in Mason jars, the substrate is the growing medium that supports the mushroom’s growth. The substrate must be prepared in a sterile environment and have the right balance of nutrients, moisture, and pH.
To create the ideal substrate for your mushrooms, you’ll need:
- Brown rice flour
- Vermiculite
- Water
- Large mixing bowl
- Fork or whisk
- Pressure cooker or large pot with lid
Follow these steps to prepare the mushroom substrate:
- Combine 2 parts vermiculite, 1 part brown rice flour, and 1 part water in a large mixing bowl. Use the fork or whisk to mix the ingredients thoroughly.
- Add more water if the mixture is too dry or more vermiculite if it’s too wet. The substrate should be moist but not too wet or dry.
- Fill the Mason jars with the prepared substrate, leaving about ¼ inch of space at the top.
- Cover the jars with a lid or foil and place them in a pressure cooker or large pot with a lid.
- Add water to the pressure cooker or pot, enough to cover the jars up to their shoulders.
- Bring the water to a boil and cook the jars for 90 minutes in the pressure cooker or 120 minutes in the pot.
- Allow the jars to cool completely before removing them from the pressure cooker or pot.
The substrate is now sterilized and ready for inoculation with the mushroom spores or mycelium. Make sure to handle the jars with clean hands or gloves to prevent contamination.
Inoculating the Mason Jars
After preparing the Mason jars and creating the ideal growing medium, it’s time to inoculate the jars with mushroom spores or mycelium. This step is crucial for initiating the growth of your mushrooms.
First, sterilize a syringe and needle with rubbing alcohol to avoid contamination. Then, inject the spores or mycelium into the substrate through the small holes in the Mason jar lid. Be sure to inject the spores evenly across the substrate to ensure uniform growth.
Once you have injected the spores, seal the holes with micropore tape or silicone sealant to maintain a sterile environment.
It’s important to note that the inoculated Mason jars should be kept in a dark and warm place, ideally around 70-75°F. Within a few days, you should see small white patches forming on the substrate, indicating that the mycelium has begun to grow.
The mycelium will soon cover the entire substrate and develop small mushroom pins. With proper care and patience, you’ll soon have your own fresh and delicious mushrooms ready to be harvested.
Caring for Your Mushroom Cultivation
Congratulations, your Mason jars are now inoculated and ready for growing! As your mushrooms begin to take shape, it’s crucial to provide the optimal care to ensure a healthy harvest.
Temperature
Mushrooms prefer a relatively cool environment with a temperature range of 60-70°F. Avoid exposing the jars to direct sunlight, which can cause overheating. Keep the jars in a cool, dark place, such as a closet or pantry, to maintain a consistent temperature.
Humidity
Mushrooms thrive in high humidity environments, with a range of 85-95% humidity level. However, too much humidity can lead to excess moisture and the growth of mold or other contaminants. To regulate humidity levels, consider investing in a humidifier or a hygrometer to monitor the environment.
Light
Mushrooms don’t require direct sunlight to grow, but they do need some light exposure to trigger the fruiting process. If possible, place the jars in a dimly lit room or near a window with filtered sunlight. Avoid exposing them to too much light, as this can lead to overheating and dryness.
Airflow
Proper airflow is critical for healthy mushroom growth. Mushrooms require fresh air to develop, and excess carbon dioxide can inhibit growth. Make sure to exchange the air in the growing area regularly by opening a window or using a fan.
Watering
It’s essential to maintain the proper moisture level in the substrate to promote healthy mushroom growth. Use a spray bottle to mist the jars once or twice a day, taking care not to overwater. If the substrate appears dry, mist it more frequently.
“Remember that mushroom cultivation requires patience and attention to detail. By following these tips and caring for your mushrooms properly, you’ll soon be rewarded with a bountiful harvest of delicious, fresh mushrooms!”
Monitoring Mushroom Growth and Harvesting
As your mushroom culture grows, it’s important to monitor its progress to ensure healthy mushroom growth. Mushrooms go through different stages during their growth cycle, and understanding these stages is crucial for a successful harvest.
Mushroom Growth Stages
The first stage of mushroom growth is the spawn run, where mushroom mycelium colonizes the substrate. During this stage, the mycelium consumes the nutrients in the substrate and prepares for the fruiting stage.
The second stage is pinning, where small mushroom pins begin to form. This stage is important, as the size and number of pins can affect the final harvest. Ensure that the growing conditions, such as temperature and humidity, are optimal for the pins to develop into mature mushrooms.
The final stage is the fruiting stage, where mushrooms grow to their full size. At this stage, it’s important to maintain the same environmental conditions to avoid any stress on the mushrooms, which can negatively impact their growth.
Harvesting Mushrooms
Once your mushrooms have reached maturity, it’s time to harvest them. To harvest your mushrooms, gently twist or cut them at the base of the stem. Avoid pulling them out of the substrate, as this can damage the mycelium and make it more susceptible to contamination.
It’s best to harvest mushrooms when they’re still young and firm, as they’ll have a better flavor and texture. Mushrooms that have become too mature will have opened caps and may release spores, which can affect the flavor and texture of the remaining mushrooms.
Fresh Mushroom Harvest
After harvesting your mushrooms, it’s best to use them within a few days for optimal freshness. If you have more mushrooms than you can use, you can also preserve them by drying or freezing.
To dry your mushrooms, slice them thinly and place them on a baking sheet in a single layer. Dry them in a warm, dry place until they’re crispy, and then store them in an airtight container. To freeze your mushrooms, blanch them first to preserve their texture and color, then store them in an airtight container in the freezer.
Troubleshooting Common Mushroom Growing Issues

As with any gardening project, mushroom cultivation can present its own set of challenges. Here are some of the most common issues you may encounter and tips for troubleshooting them.
Contamination
One of the most frustrating issues in mushroom cultivation is contamination. This can occur when unwanted bacteria or fungi infiltrate the growing environment and harm the mushrooms. Common signs of contamination include strange colors or odors in the substrate or on the mushrooms themselves.
To prevent contamination, be sure to sterilize all equipment thoroughly before use. If you do notice signs of contamination, it’s best to discard the affected jars to avoid spreading the issue to other jars.
Pests
Pests such as mites or maggots can also become an issue during mushroom cultivation. To prevent pests, make sure to keep your growing area clean and free of debris. You may also want to use a pesticide designed for mushroom cultivation to prevent pest issues.
If pests do appear, one solution is to increase the ventilation in the growing area. This can help dry out the substrate and make it less appealing to pests.
Slow Growth
If your mushrooms seem to be growing slowly, there are a few possible causes. One is that the temperature or humidity levels may not be optimal for growth. Make sure to monitor these factors and adjust as needed.
Another issue could be that the substrate is too dry or too wet for the mushrooms to properly grow. Check the moisture levels and adjust accordingly.
With these troubleshooting tips in mind, you should be able to overcome any issues that arise during your mushroom cultivation project. Happy growing!
Conclusion
In conclusion, growing mushrooms in Mason jars is a fun and rewarding way to cultivate your own fresh produce right at home. Not only is it cost-effective and space-saving, but it also allows you to have complete control over the growing conditions of your mushrooms.
Get Creative
Don’t be afraid to get creative with your mushroom growing project. Experiment with different mushroom varieties and substrate materials to find the combination that works best for you.
Patience is Key
Mushroom cultivation requires patience and attention to detail. It may take some time before you see results, but don’t get discouraged. Keep checking on your mushrooms and adjusting the growing conditions as needed.
Enjoy the Fruits of Your Labor
Once your mushrooms have reached maturity, it’s time to harvest and enjoy them! Whether you’re using them in a delicious recipe or simply enjoying them sautéed with some butter and garlic, there’s nothing quite like the taste of fresh, homegrown mushrooms.
So what are you waiting for? Start your mushroom cultivation adventure today and experience the joy of harvesting your own delicious mushrooms!
FAQ
What are the benefits of growing mushrooms in Mason jars?
Growing mushrooms in Mason jars offers benefits such as cost-effectiveness, space-saving advantages, and the ability to control the environment for optimal growth.
Which mushroom varieties are suitable for Mason jar cultivation?
Not all mushrooms are suitable for growing in Mason jars. It’s best to choose varieties like oyster mushrooms, shiitake mushrooms, or lion’s mane mushrooms that thrive in controlled environments.
What supplies do I need to grow mushrooms in Mason jars?
To grow mushrooms in Mason jars, you’ll need supplies such as Mason jars, substrate materials like sawdust or straw, mushroom spores or mycelium, a pressure cooker for sterilization, and basic gardening tools.
How do I prepare Mason jars for mushroom cultivation?
Properly preparing Mason jars involves cleaning and sterilizing them to create a sterile environment. This can be done by washing the jars with hot, soapy water, rinsing thoroughly, and sterilizing them in a pressure cooker or boiling water.
What is mushroom substrate and how do I create it?
Mushroom substrate is the material on which mushrooms grow. It can be made from various organic materials like sawdust, straw, or coffee grounds. To create the substrate, you’ll need to mix these materials with water and sterilize them before use.
How do I inoculate the Mason jars with mushroom spores or mycelium?
Inoculating the Mason jars involves introducing mushroom spores or mycelium to the sterilized substrate. This can be done by transferring a small amount of spores or mycelium to each jar and ensuring they are evenly distributed.
What care do mushrooms need during cultivation?
Mushrooms require specific conditions for optimal growth. This includes maintaining a suitable temperature, high humidity levels, and providing indirect light. Regular misting and proper air circulation are also important for their well-being.
How do I monitor mushroom growth and harvest them?
Monitoring mushroom growth involves observing the development of mycelium and the appearance of fruiting bodies. Once the mushrooms are mature, they can be harvested by gently twisting or cutting them near the base.
What are some common issues in mushroom cultivation and how can I troubleshoot them?
Common issues in mushroom cultivation include contamination, pests, and improper environmental conditions. To troubleshoot these problems, proper sterilization practices, pest control measures, and adjusting environmental factors can help mitigate the issues.
What is the conclusion of growing mushrooms in Mason jars at home?
Growing mushrooms in Mason jars is a rewarding and accessible way to cultivate fresh mushrooms. With the right supplies, care, and patience, you can enjoy the satisfaction of harvesting your own delicious mushrooms right at home.